How to connect to your StorageNode Instance
How to connect to your StorageNode Instance
After completing the ordering process you will receive a welcome email containing the details of the provisioned StorageNode instance. You will need the following information from the welcome email to be able to connect and login to your StorageNode:
Port Number
The port number your StorageNode is mapped to e.g. 60242. This is the connection port for your service.
Admin User Password
The Admin user password can be retrieved from your ClientPortal or Welcome email.
Connect from UNIX
With the above pieces of information. You will be able to login and start utilising your StorageNode, with the following terminal command.
ssh [storageNodeURL]-l admin -p [Port]
Example:
ssh snode-syd-1.solnode.com -l admin -p 60012
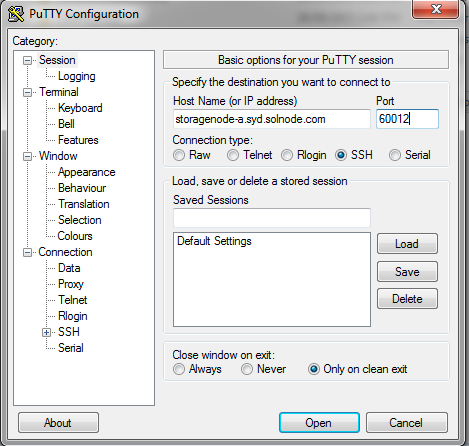
Connect from Windows
To access your StorageNode from a Windows machine you will need an SSH client. You can use a free simple SSH client called Putty [Download link]
Once you have installed an SSH client fill out the relevant details.
- Specify the StorageNode url for the “Host Name” within the session configuration screen
- Specify the provided port number for your StorageNode instance
- Click “Open” or “Connect“